

Caliper Pad Retainer & Pad Plate: Faults, Replacement, Care
How the caliper pad retainer and pad plate work, the symptoms of a fatigued spring, correct replacement steps and the checks that keep wear even.
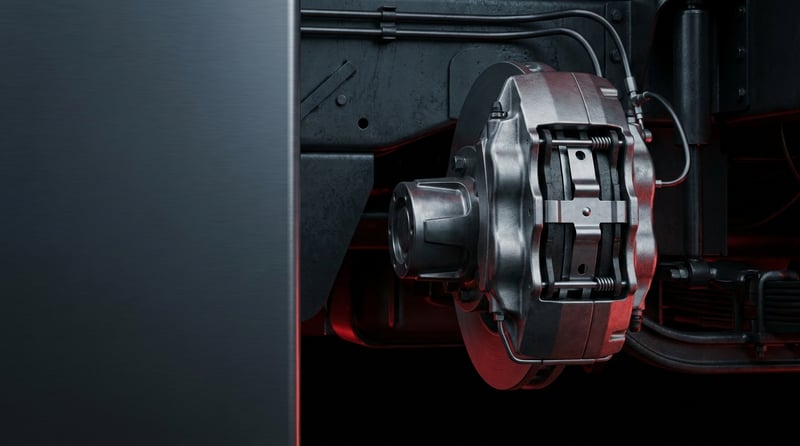
When a brake pad is changed on a disc-braked tractor unit, the first thing most technicians look at is pad thickness; yet the small kit that holds the pad in its carrier abutment matters just as much. On a caliper with a loose retainer bridge, a fatigued spring or a distorted pad plate, the pad no longer wears evenly, a grinding, chattering noise appears at the pedal and, worst of all, the two wheels on the same axle start braking differently. A large share of the vehicles that arrive at the workshop with "we changed the pads but the noise stayed" have no fault in the pad at all: the retainer kit was left out or reused in a worn condition. This guide explains, from a service point of view, what the caliper pad retainer and pad plate do, how their failures announce themselves, the correct diagnostic order, the discipline required during removal and refitting, and the maintenance habits that extend their life.
This document was prepared by the VADEN technical team on the basis of heavy commercial vehicle brake system service practice and OE manufacturer documentation. The values given here are general reference figures; for exact data such as tightening torque and pad or disc wear limits, the current OE service manual matching the engine/chassis code of the vehicle takes precedence. Last updated: July 2026.
What Is a Caliper Pad Retainer & Pad Plate? Function and Operating Principle
The caliper pad retainer and pad plate are the mechanical elements that secure the pads in their abutment inside a heavy commercial vehicle air disc brake caliper and spread the force of the thrust element (tappet) evenly across the pad backing plate. The retainer bridge, spring and pin kit prevent the pad from moving in its abutment under the typical 8–8.5 bar service pressure of a 22.5 inch wheel group, while the pad plate prevents point loading from distorting the backing surface.
The same group of parts is known in the workshop and in catalogues under several names: pad retainer bridge, pad retaining spring, pad retaining pin, pad plate, thrust plate and, in some applications, caliper cover spring. They all belong to the same functional family: to locate the pad in the caliper abutment, to carry the vibration generated during braking and to let the pad release cleanly from the disc when the brake is applied and then released.
The operating principle is built on force transfer. Pressure arriving from the brake chamber is multiplied through the cam mechanism inside the caliper and passed to the thrust elements. The thrust element does not bear directly on the pad backing plate; the pad plate sits between them. By spreading a load that arrives at a single point across the back of the pad, the plate limits doming of the backing plate and the corner wear that follows from it. Meanwhile the retainer kit presses the pad radially and takes up the clearance in the abutment. When braking force is transferred from the pad into the caliper carrier, the retainer does not carry that force; its job is to prevent vibration and rattle and to release the pad on the return stroke.
Heavy commercial disc brakes use a sliding type caliper: thrust is applied only to the inner pad, and the caliper body slides on its guide pins so that the outer pad is also pressed against the disc. This architecture explains why the retainer kit is so critical. If the caliper slides, the pad moves too, at the micron level; once the retaining spring fatigues that movement grows to millimetres and the pad no longer separates fully from the disc when the brake is released. The result is a dragging pad, rising temperature and premature wear.
Brake approval framework and standards family
The caliper pad retainer and pad plate form part of an assembly that is assessed within the brake system approval of the vehicle. Heavy commercial vehicle braking performance is defined within the framework of ECE R13; for brake pads and pad kits supplied as replacement parts, the ECE R90 approval regime applies. For the characterisation of friction material, dynamometer test standards such as ISO 26867 are used as a reference. Although the retainer and the pad plate are not themselves the direct subject of these approvals, using a retainer that alters the geometry in which the pad kit was approved means the system departs from its defined operating condition. The applicable standard revision and the kit within which the part was approved must be verified from the relevant OE catalogue.
Components of the retainer kit
- Pad retainer bridge (bracket/spring bridge): The steel bridge that sits transversely across the caliper mouth and presses the pads into position.
- Retaining pin / guide pin: The element that connects the bridge to the caliper body, secured in most applications by a safety pin or a bolt.
- Pad retaining spring (leaf spring): The spring plate that bears on the back of the pad, takes up radial clearance and prevents rattle.
- Pad plate (thrust plate): The plate that sits between the thrust element and the back of the pad, spreading the load and limiting heat transfer.
- Safety clip / pin: The small but indispensable locking element that stops the bridge from working loose under vibration.
- Wear sensor seat and cable retainer: The parts that keep the cable on the pad routed correctly in sensor equipped applications.
Application differences: design varies with the caliper family
The design of the caliper pad retainer and pad plate depends far less on the make of the vehicle than on the brake caliper family built into it. The OE caliper families most often encountered in the field on heavy commercial vehicles originate from Knorr-Bremse and Wabco; even the front and rear axles of the same tractor unit may carry different caliper sizes and therefore different retainer geometry. The table below is a comparison intended to guide service planning; the binding match is made from the caliper type label and the OE number.
| Caliper family / application | Retainer type | Typical disc diameter | Service note |
|---|---|---|---|
| Heavy tractor unit and trailer, 22.5 inch wheel group (Knorr-Bremse type) | Transverse bridge + leaf spring + safety pin | Ø430–Ø440 mm | Bridge and spring renewed together with the pad set |
| Heavy tractor unit and bus (Wabco PAN/MAXX type) | Bridge + bolted fixing, integrated spring | Ø430–Ø440 mm | The fixing bolt may be single use |
| Urban distribution and midibus, 19.5 inch group | Short bridge + single spring | Ø370–Ø400 mm | Abutment clearance is tighter, pad plate thickness is critical |
| Bus rear axle, intensive stop-and-go duty | Bridge + reinforced spring | Ø430 mm class | Spring life is shorter because of thermal fatigue |
| Trailer / semi-trailer axle | Standard bridge + spring kit | Ø430 mm class | Corrosion and road salt dominate retainer wear |
The caliper pad retainer and pad plate are specific to the caliper type; even on the same vehicle model, different geometry may be used depending on axle and equipment level. Do not select the part by "vehicle model" alone. Verify the type label on the caliper body, the axle position and, where possible, the OE number on the removed part together. A one millimetre difference in the abutment means forcing during assembly, and a forced retainer means a safety pin that breaks out on the road.
How can a Caliper Pad Retainer & Pad Plate fault be identified?
Caliper pad retainer and pad plate faults rarely announce themselves directly; they are read indirectly from the pad and the disc. Noise, an irregular wear pattern and a temperature difference are the three most reliable indicators. The table below matches field symptoms with their probable causes and the method used to confirm them.
| Symptom | Probable cause | Check / verification |
|---|---|---|
| Metallic rattle from the wheel area on rough roads with the brake released | Retaining spring fatigued, bridge loose, pad moving in the abutment | Move the pad radially by hand with the vehicle on the ground; visually confirm that the bridge and safety pin are in place |
| Pad worn at an angle from the corner or from one side | Pad plate distorted or omitted, load not distributed evenly across the surface | Measure the thickness difference between the leading and trailing edge of the removed pad with a caliper gauge; check the pad plate surface on a flat plate |
| Marked temperature difference between the two wheels on the same axle | The pad on one side is not fully retracting, the retainer is causing binding | Compare hub and disc temperatures with an infrared thermometer after a test drive |
| Friction noise continues after the brake is released, disc has blued | Pad seized in the abutment; corrosion product has swollen the retainer surface | Check that the caliper slides freely on its guide pins; inspect the cleanliness of the abutment and pad plate seating surfaces |
| Safety pin or clip missing, bridge sitting on one side only | The locking element has worked out under vibration or was never fitted | Visual inspection; examine the pin for deformation |
| Crushing on the pad backing plate, deep imprint on the pad plate | Pad plate reused with an old kit, surface hardness lost | Measure pad plate thickness with a caliper gauge, compare the depth of the load imprint |
| Vibration at the brake pedal, judder felt through the steering | Irregular pad contact and the disc thickness variation that follows from it | Measure disc thickness variation (DTV) with a dial gauge around the circumference |
| Rust blistering on the retainer bridge and spring, thinning cross section | Corrosion from salt and moisture; particularly on trailer axles | Inspect the cross section after wire brushing; if blistering is present the part is renewed |
Visual inspection order: from the outside in
Diagnosis starts with the cheapest step. First the caliper mouth is cleaned; it is then confirmed visually that both ends of the bridge are fully seated, that the safety pin is in place and that the spring bears on the back of the pad. Next the pad is moved radially by hand; if there is perceptible free play, the retainer kit is not doing its job. Finally the leading and trailing edge thicknesses of the pad are compared — angled wear almost always points to a load distribution problem.
Verification by temperature
After a short test drive, the temperatures of the two wheels on the same axle are compared with an infrared thermometer. A dragging pad leaves a disc that is noticeably hotter than its neighbour. This method alone does not separate binding caused by the retainer from binding caused by the caliper, but it shows within a few minutes which wheel needs to come off. The most common mistake in the field is measuring a single wheel and drawing a conclusion from it; the measurement must always be comparative across the same axle.
Reading backwards from the removed part
When the pad set is removed, the retainer, the pad plate and the pad are assessed together. A deepened load imprint on the pad plate shows that this plate has run for at least one set too long. If the bridge is bent, the spring has taken a permanent set or the safety pin is deformed, the complete kit is renewed. If the seating surface on the pad backing plate has become polished, the pad has been moving in its abutment; in that case changing only the pad brings the problem back a few thousand kilometres later.
How is a Caliper Pad Retainer & Pad Plate replaced? Step by step
Replacing the caliper pad retainer and pad plate is an intervention on the vehicle's brake system. The vehicle must be on level ground, chocked and secured. Personal protective equipment is mandatory: impact resistant goggles, cut resistant gloves, a dust mask and workwear. Never blow brake dust out with compressed air; it creates respirable dust, so use suitable extraction or a wet cleaning method. When removing a bridge that is under spring load, allow for the direction in which the part may fly. After the work, the vehicle does not go back on the road until brake performance has been verified.
1. Secure the vehicle: Park on level ground, apply the parking brake, chock the wheels and make sure air pressure is stable. Choose the lifting points specified by the manufacturer and support the vehicle on stands.
2. Remove the wheel, let it cool and take the initial measurements: After heavy duty the surface temperature of the disc and caliper is high; dismantling before cooling means both a burn risk and inaccurate measurement. Once the area has cooled, and before starting to dismantle, record pad thickness, disc thickness and the condition of the wear sensor — this data is the reference for the comparison after replacement.
3. Clean the area: Free the caliper mouth, the bridge seating surfaces and the pad abutment from brake dust and corrosion product. A new retainer fitted into a dirty abutment runs in the wrong position from day one.
4. Remove the locking element: Take out the safety pin or clip that holds the bridge. In most applications this element is single use; the removed pin is set aside and not reused.
5. Release the bridge and spring under control: The bridge is under spring load. Press it down with a suitable tool and release it gradually, never letting it snap free. Set the removed bridge and spring aside, noting the position they came from.
6. Remove the pads and pad plates: Lift the pads out of the abutment and carefully take the pad plates off the thrust elements. Always note which face of the plate was towards the pad; a plate fitted the wrong way round distributes the load incorrectly.
7. Inspect the caliper and the thrust elements: Confirm that the caliper slides freely on its guide pins, that the boots are not torn and that the thrust element boots are intact. On a binding caliper, a new retainer kit will not solve the problem.
8. Compare the new kit: Lay the new bridge, spring, pin and pad plates alongside the removed parts and compare length, thickness, bend and abutment geometry. Any difference must be verified before the part is fitted.
9. Seat the pad plates and pads: Place the pad plates on the thrust elements the right way round and slide the pads into the abutment without forcing. If the pad does not enter easily by hand, the abutment is still dirty or the part is wrong; driving it in with a hammer is not an acceptable method.
10. Torque the bridge and lock it: Bring the spring and bridge into position, tighten the fixing bolt or pin to the torque specified by the manufacturer, then fit a new safety pin or clip. A torque wrench is mandatory; a bridge tightened "by feel" either chokes the pad or works loose under vibration.
11. Verify adjustment and clearance, then test: Check the automatic adjuster mechanism of the caliper according to the procedure, refit the wheel and tighten the nuts progressively. Then carry out a bedding-in drive with progressive braking at low speed and, after the test, compare disc temperatures across the axle.
What are the most common mistakes when replacing a Caliper Pad Retainer & Pad Plate?
Leaving the caliper pad retainer and pad plate kit as it is and changing only the pad is the most frequent mistake in the field. A fatigued spring lets the new pad move from day one; the result is rattle, angled wear and an early return to the workshop. If the spring or bridge shows permanent set, a thinned cross section or corrosion blistering, the kit must be renewed together with the pad.
Trying to straighten a bent bridge, to substitute wire or a bolt for a broken safety pin, or to grind a pad plate thinner is not an acceptable repair. These elements are produced in a defined material and heat treatment class; interfering with them can lead to unexpected displacement under braking and to loss of the pad. A damaged element is replaced, not repaired.
- Assembling without cleaning the abutment: Corrosion product and brake dust cause the new pad to seize in the abutment and not retract fully.
- Fitting the pad plate reversed or omitting it: The load is not spread evenly across the surface; the pad starts wearing from the corner within a few thousand kilometres.
- Reusing the safety pin: A pin that has been bent once can work out under vibration the second time around.
- Forcing the pad into the abutment with a hammer: The backing plate and the abutment surface are deformed; the problem shows up not during assembly but on the first descent.
- Not using a torque wrench: Insufficient torque on the bridge fixing leads to loosening, excessive torque bends the bridge.
- Renewing the kit on one wheel only: Brake balance is established per axle; both sides of the same axle are dealt with together.
- Closing up without checking that the caliper slides freely: On a binding caliper even the best retainer kit does no more than mask the problem.
- Blowing brake dust out with compressed air: This is both a health risk and a way of carrying dust into the caliper boot and guide pin bore.
- Loading the vehicle without a bedding-in drive: New pads and a new retainer kit settle during the first progressive brake applications; if this step is skipped, performance in the first heavy braking event falls below expectation.
- Taking the wear sensor cable out of its route: A loose cable rubs against the disc or the bridge and breaks in a short time.
Caliper Pad Retainer & Pad Plate technical values and inspection points
The values given for the caliper pad retainer and pad plate are general reference ranges commonly encountered in heavy commercial vehicle air disc brake applications. The caliper family, axle position and equipment level shift these ranges; for exact data, the current OE service manual of the vehicle takes precedence.
| Parameter | Typical range (general reference) | Note |
|---|---|---|
| Service brake circuit operating pressure | 8–8.5 bar (116–123 psi) | Reservoir pressure is typically in the 10–12.5 bar band |
| Total thickness of a new pad (backing plate + friction material) | Approximately 28–32 mm | Varies with the caliper and disc family |
| Pad wear limit (friction material) | Approximately 2 mm above the backing plate | The limit value is taken from the manufacturer's manual |
| Disc thickness (new / wear limit) | Typically 45 mm / 37 mm in the Ø430 class | Varies with disc diameter; measured with a dial gauge |
| Disc thickness variation (DTV) tolerance | Generally below 0.05–0.10 mm | Pedal judder starts once it is exceeded |
| Radial clearance of the pad in the abutment (retainer fitted) | No perceptible movement | A pad that moves by hand indicates a fatigued spring |
| Pad plate thickness | Typically 2–5 mm | Renewed if crushed or deeply imprinted |
| Disc surface temperature (heavy descent) | Can reach the order of 400–700 °C | The main cause of thermal fatigue in the retaining spring |
| Disc temperature difference across the axle (after a test drive) | No marked difference | If a difference exists, binding is investigated |
| Fixing point | Typical torque band (general reference) | Application note |
|---|---|---|
| Pad retainer bridge fixing bolt | 25–45 Nm | In some applications the bolt is single use |
| Caliper guide pin cap bolt | 10–25 Nm | Boot integrity is checked at the same time |
| Caliper carrier bolts | High torque class, angle tightening common | Value and angle are taken only from the manual |
| Wheel nuts | Application specific high torque | Tightened progressively and crosswise, the manual governs |
The torque values are given only as a guiding range. The front and rear axles of the same vehicle may use different caliper families, and some manufacturers define separate values for initial assembly and refitting. What governs in practice is the current service manual specific to the vehicle manufacturer's chassis/axle code, and the use of a torque wrench is mandatory.
- Is the retainer bridge fully seated at both ends, is the safety pin or clip in place?
- Does the pad move by hand in the abutment — if it does, the spring is fatigued.
- Is the pad plate the right way round, is there a deep load imprint or distortion on its surface?
- Is there corrosion blistering on the bridge and spring, or thinning of the cross section?
- Does the caliper slide freely on its guide pins, are the boots intact?
- Are the leading and trailing edge thicknesses of the pad close to each other?
- Is the wear sensor cable secured on its route and in its retainers?
- Are the disc temperatures across the axle close to each other after the test drive?
How is a Caliper Pad Retainer & Pad Plate maintained and its life extended?
The caliper pad retainer and pad plate have no calendar based replacement interval of their own; what determines their life is thermal load, corrosion and assembly discipline. In practice the right approach is to treat the retainer kit as part of the same service item as the pad. At every pad change the bridge, spring, safety pin and pad plate are assessed individually; where there is doubt, they are renewed. The cost of these elements stays low next to the cost of taking a wheel off a second time and standing the vehicle down.
- Assessment together with the pad: The retainer and pad plate are reviewed with every pad set; running the same kit through a second set should be the exception, not the rule.
- Abutment cleanliness: The pad abutment and the bridge seating surfaces are freed from corrosion product at every service. The use of oil and grease in the caliper area is limited to the points and products permitted by the manufacturer.
- Preserving caliper freedom: If the guide pin boots are torn, moisture and salt get inside; a binding caliper rapidly fatigues the retainer kit as well.
- Managing thermal load: Using the engine brake and retarder on long descents lowers the thermal load carried by the service brake and directly extends spring and pad plate life.
- Winter conditions and salt: On trailers and axles working on salted roads, retainer corrosion accelerates noticeably; a check at the end of winter is a good habit.
- Working per axle: Both sides of the same axle are renewed together; a one sided intervention upsets brake balance.
- Follow-up after the work: During the first few hundred kilometres after replacement, noise, temperature and pad position are checked again.
- Sensor and cable care: Keeping the wear sensor cable fixed in its retainers protects the life of both the sensor and the retainer.
In fleet operations the most efficient approach is to take the wheel off once and deal with the whole brake corner while it is off. Renewing the pad, retainer bridge, spring, safety pin and pad plate in the same service is markedly cheaper than bringing the vehicle back in a few months later because of rattle or angled wear. The most common reason for a repeat workshop visit in the field is the retainer kit being left in place during a pad change because it "still looks serviceable".
Blog
3 2026-08-08
Caliper Carrier & Guide Pins: Faults, Replacement, Care
Learn how caliper carrier and guide pin wear causes uneven pad wear, how to test slide freedom, replace the kit step by step and grease it correctly.
 2026-08-08
Caliper Cover, Gasket & Plate: Faults, Replacement, Care
Learn how caliper cover, gasket and plate faults develop on air disc brakes, how to diagnose leaks, replace the group correctly and extend its life.
 2026-08-07
Caliper Guide Pin, Bushing & Bolt: Faults, Repair, Care
Learn how caliper guide pins and bushings seize, how to diagnose uneven pad wear, and the correct removal, greasing and torque steps for replacement.